

Recipe: Baked Brie
President Cheese sent me a Brie to come up with a recipe and of course baked Brie is what comes immediately to mind. I mean Brie with a good bread is fine, but I often get Brie bites or baked Brie in restaurants, so, why not make my own? It is an easy recipe that will make for a great appetizer and takes less than 30 minutes to make.

Recipe: Baked Brie

Recipe: Baked Brie
President Cheese sent me a Brie to come up with a recipe and of course baked Brie is what comes immediately to mind. I mean Brie with a good bread is fine, but I often get Brie bites or baked Brie in restaurants, so, why not make my own? It is an easy recipe that will make for a great appetizer and takes less than 30 minutes to make.
Preheat the oven at 400 F
Put the Brie in a skillet and make some incisions with a knife on the top crust. so it is easier to dip a piece of bread ion it.
Pour a bit of olive oil on top.
Add small tomatoes on the side and top them with slices of bread (I used a baguette).
Pour olive oil over the Brie, bread and tomatoes. With a brush, spread the olive oil evenly.
Bake for 18 to 20 minutes. The Brie should be soft and creamy at that point.
To reheat, bake for 10 minutes at 325 F

Recipe: Baked Brie

Recipe: Baked Brie
Et voila!
Enjoy (I did)!
If you like this post, the photos or the blog, please feel free to share it or post a comment! Merci!

Recipe: Vegetarian Chili
A while back, I published a recipe of vegetarian chili, made with tofu. Since then, I discovered a meatless product at Trader Joe’s (I am not paid for this nor was I asked by this company to promote their product!) that really looks like ground beef and has the same texture, but is made with soy.

Meatless chili
A while back, I published a recipe of vegetarian chili, made with tofu. Since then, I discovered a meatless product at Trader Joe’s (I am not paid for this nor was I asked by this company to promote their product!) that really looks like ground beef and has the same texture, but is made with soy.
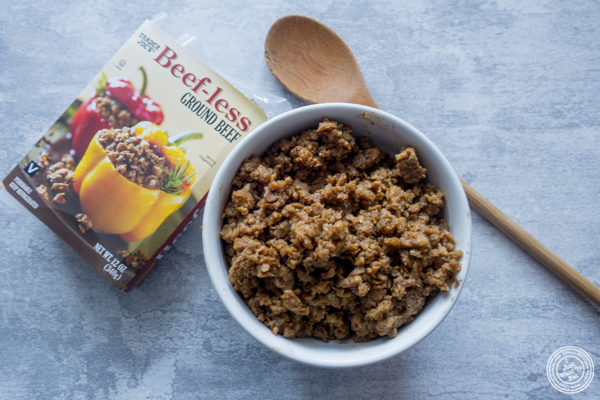
Meat-less beef from Trader Joe’s
Here is my recipe that was inspired from childhood memories:
Time: 5 minutes preparation and 1 hour cooking
Ingredients for 5 servings
2 package of meat-less beef
2 cans of tomato sauce (I use unsalted tomato sauce - cans of 15 oz)
2 (15 oz) cans of red beans
1/2 cup olive oil
1 table spoon minced garlic or 3 garlic cloves minced
1 table spoon chili powder
1/2 table spoon of Ancho chili powder
1/4 table spoon of cayenne pepper powder

Ingredients
Preparation:
In a cooking pot, put the olive oil and garlic on medium heat. Cook the garlic for two minutes after sizzling. Then, add the meatless beef and stir with a spoon to break it as it comes compact, like a brick. Although the meatless beef is pre-cooked, cook it for 5 minutes with the garlic. Then, add the beans, tomato sauce and spices. Do not add salt: the meatless beef has already enough sodium in it. Know that, to neutralize some of the tomato sauce acidity, some people add a small cube of sugar.

Step 1: cook meatless chili with the garlic
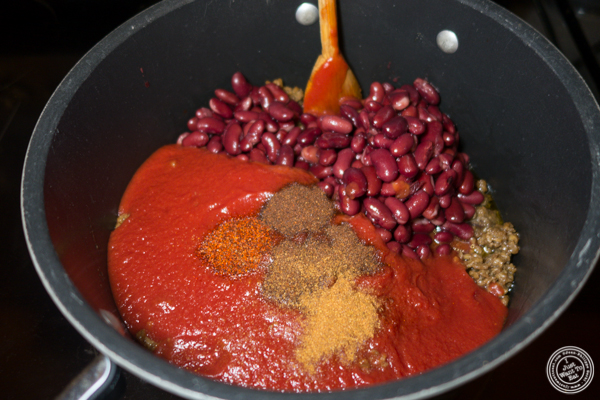
Step 2: add the tomato sauce, beans and spices
Cooking:
Cook for 1 hour on low heat.

Step 3: cook on low heat
Et voila! Serve with cheese (I often use a Mexican blend), sour cream and guacamole.

Chili
Bon appétit!
If you like this post, the photos or the blog, please feel free to share it or post a comment! Merci!

Recipe: Ratatouille
Ratatouille is a Provencal dish that originated in Nice, in the South of France. Needless to say that this dish became popular after the Disney movie of the same name and it is now not uncommon to see it on menus in New York. Comforting, this is the kind of dish where every family has its own recipe. Some cook the vegetables separately. others together. Even the way the vegetables are cut can differ, some preferring them grossly cut and others, like myself, small. Know that it has to cook for a long time and you will surely get a fantastic smell in your apartment.

Ratatouille
Ratatouille is a Provencal dish that originated in Nice, in the South of France. Needless to say that this dish became popular after the Disney movie of the same name and it is now not uncommon to see it on menus in New York. Comforting, this is the kind of dish where every family has its own recipe. Some cook the vegetables separately. others together. Even the way the vegetables are cut can differ, some preferring them grossly cut and others, like myself, small. Know that it has to cook for a long time and you will surely get a fantastic smell in your apartment.
You can eat it as a side with chicken for instance, the ratatouille being just warm, or with a nice bread, like you would it a paté.
Here is my recipe that was inspired from childhood memories:
Time: 30 minutes preparation and 3 hours cooking
Ingredients for 6 servings
4 zucchini
1 eggplant
3 peppers (I use yellow peppers for their sweetness)
1/2 cup olive oil
1 table spoon minced garlic or 3 garlic cloves minced
1 table spoon thyme
2 bay leaves
1 tea spoon of salt

Ingredients
Preparation of the vegetables:
Cut the peppers, eggplant and zucchini in small pieces. Note that I always remove the skin from the eggplant when making ratatouille.
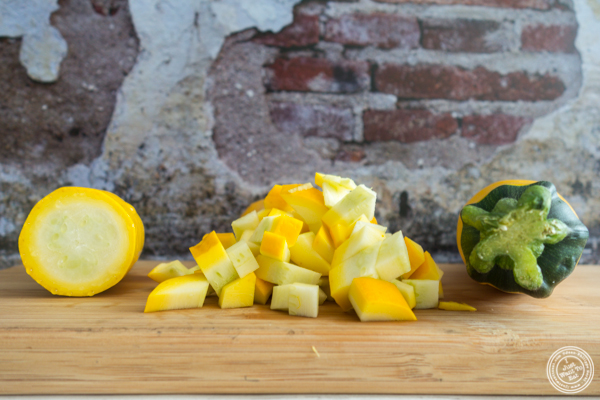
Zucchini

Peppers

Eggplant
Cooking:
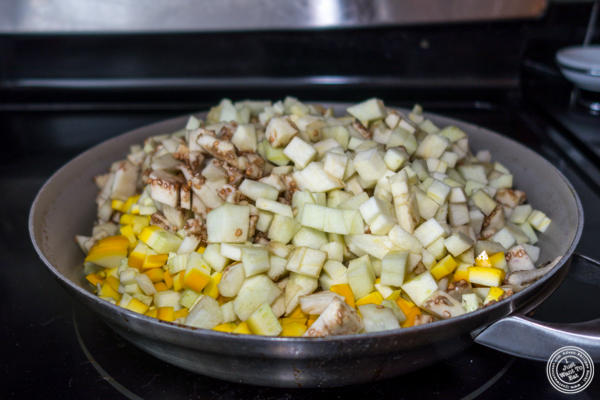
In a large pan, put the olive oil, garlic and vegetables: do not worry if the vegetables overflow a bit the pan as they will reduce during the cooking process. Start cooking at medium heat and when you hear it sizzling, lower to low heat.
Ratatouille - start of the cooking process
After an hour, put the thyme, bay leaves and salt. Continue cooking for 2 more hours on low heat.

Ratatouille - after an hour, add the herbs

Ratatouille

Ratatouille - finished!

Ratatouille
Bon appétit!
If you like this post, the photos or the blog, please feel free to share it or post a comment! Merci!

Recipe: banana soufflé
When I was a kid, the only soufflé I knew was the cheese soufflé that my Mom was making. We never heard about sweet soufflés and it is only much later in my life that variations on soufflés started to appear, like the cauliflower soufflé we made one time with my sister. Then I discovered chocolate soufflés, and one time, banana soufflés. The latter is fantastic; well, if you like bananas! So, the recipe below is my take on a recipe I learned at the Institute of Culinary Education few years ago.
When I was a kid, the only soufflé I knew was the cheese soufflé that my Mom was making. We never heard about sweet soufflés and it is only much later in my life that variations on soufflés started to appear, like the cauliflower soufflé we made one time with my sister. Then I discovered chocolate soufflés, and one time, banana soufflés. The latter is fantastic; well, if you like bananas! So, the recipe below is my take on a recipe I learned at the Institute of Culinary Education few years ago.
I should mention that you can prepare the soufflés in advance and keep them in the refrigerator before baking them for 10 to 12 minutes.
Duration: 30 minutes
Ingredients for 2 soufflés:

Ingredients for banana soufflés
- 2 ripe bananas (I started with one, but added a second to get more flavor)
- 2 egg whites
- 1/5 cup sugar + 1 tablespoon
- 2 tablespoons of water
- 4 drops of vanilla extract
- A pinch of salt
- 1 tablespoon of melted butter
Step 1 - prepare the banana purée
Peel the bananas and purée them in a blender.

Purée the bananas in a blender
Step 2 - prepare a sugar syrup
In a small sauce pan, add 1/5 of a cup of granulated sugar and 2 tablespoons of water. Bring to a boil and stir for 4 minutes, until it thickens and the sugar crystals completely dissolve.

Prepare a sugar syrup

Prepare a sugar syrup
Step 3 - Mix the banana purée in the sugar syrup
Take 1 cup of the banana purée and mix in the sugar syrup with 4 drops of vanilla extract, stirring well while still on the stove. Remove from the stove once done and transfer the bowl.

Banana purée mixed with the sugar syrup
Step 4 - Incorporate the egg whites in the banana purée
Put the egg whites and a pinch of salt in a mixer and whip the whites until firm. Then, add a tablespoon of granulated sugar and whip again.
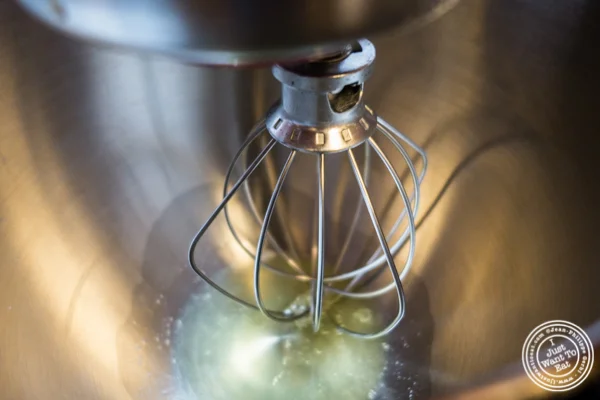
Whipping the egg whites
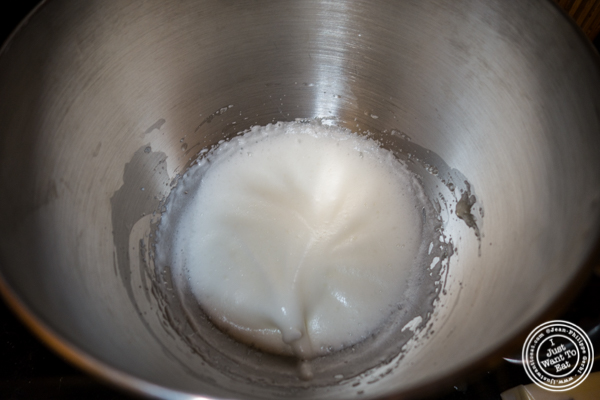
Whipping the egg whites
After obtaining firm egg whites, incorporate the whites slowly into the banana purée.

Incorporate the egg whites into the banana purée
Step 5 - Prepare the ramequins
Melt the butter and coat the sides of two ramequins. Then add some granulated sugar and coat again the sides of the two ramequins, the butter allowing the sugar to stick.

Coat the sides of the ramequins with butter and sugar
Pour the banana purée into the ramequins. At that point, you can either bake the soufflés immediately or later, in which case, you need to keep them in the refrigerator.
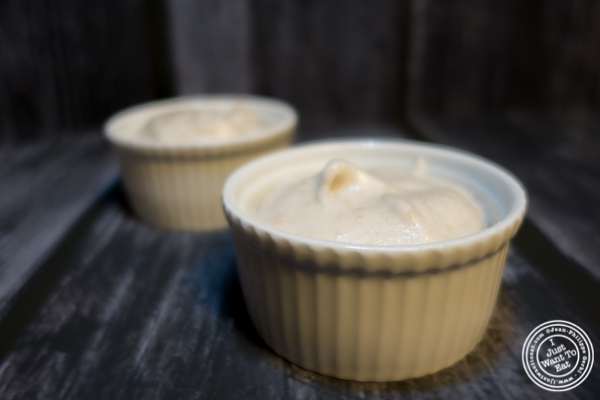
Pour the banana purée into the ramequins
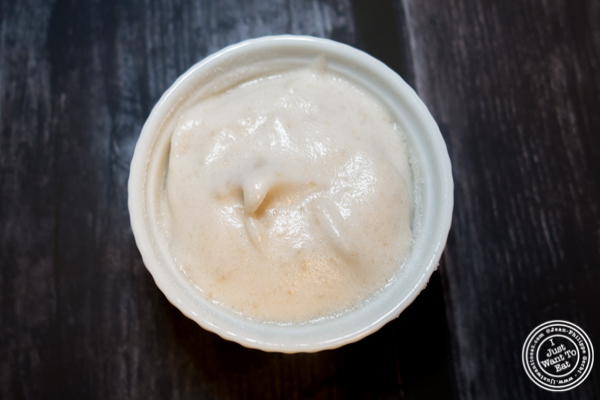
Pour the banana purée into the ramequins
Step 6 - Bake the soufflés
Pre-heat the oven to 400 F. When you reach that temperature, lover to 375 F.
Run a knife around the sides of the ramequins, to remove any pressure on the purée when baking. Then put the ramequins in the oven for 10 to 12 minutes or until the top is brown. Remove and serve. Bon appétit!

Banana soufflé

Recipe: miso ramen with braised pork belly or tofu
I love ramen and New York is a perfect city to try different ones, having so many places proposing that delicious Japanese dish. And my favorite moment to eat that soup is now, as I like it hot and was never really impressed by cold versions of it. This recipe requires a bit of work, but it is worth it!
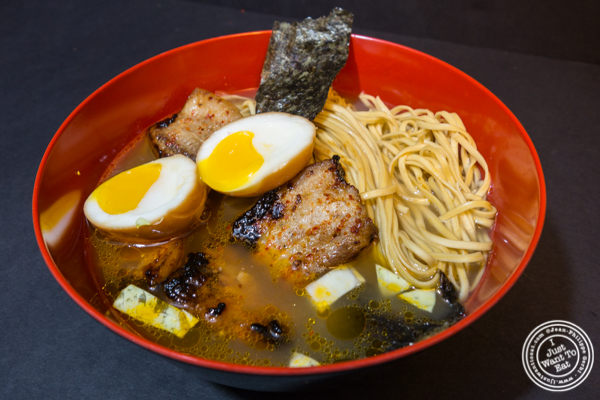
Miso ramen with pork belly
I love ramen and New York is a perfect city to try different ones, having so many places proposing that delicious Japanese dish. And my favorite moment to eat that soup is now, as I like it hot and was never really impressed by cold versions of it. This recipe requires a bit of work, but it is worth it!
Time to prepare and cook: 5 hours (4 hours for the broth)
Ingredients:
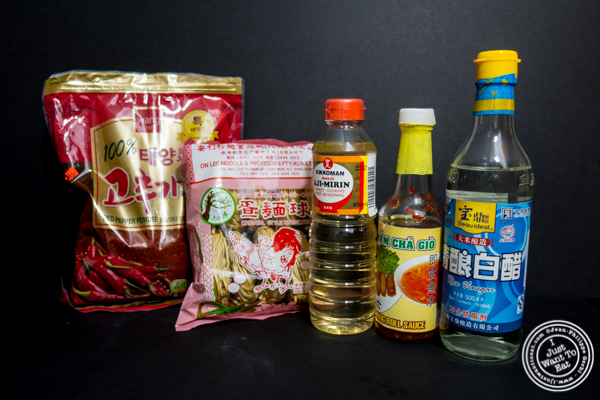
Ingredients

Seaweed and white miso
For the braised pork belly (see below for the preparation of the tofu is you prefer vegetarian):
- 2.5 lb of pork belly
- 1 table spoon of gochugaru that is red pepper flakes
- 1 table spoon of coarse salt
- 1/3 cup of olive oil
- 1/4 cup rice vinegar
- 1/4 cup spring roll sauce (sweetness to counterbalance the vinegar)
- 1/8 cup soy sauce
- 1/2 cup water
- 2 tbsp garlic
- 1 tsp powdered ginger
For the broth:
- 1.5 lb chicken wings
- 2 lb pok bones
- 5 carrots
- 3 onions
- 2 large russet potatoes
- scallions
- salt
For the eggs:
- 2 eggs
- 1 table spoon soy sauce
- 1 table spoon mirin wine
For the soup itself:
- Egg noodles (I bought them in Chinatown)
- A green cabbage
- some seaweed
- 2 eggs
- 1 tablespoons of soy sauce
- 1 tablespoon of Mirin wine
- scallions
Step 1: start with the broth as it takes 4 hours to cook
Note: you can also use pork or chicken broth bought at the supermarket, but it will not be as good.
First, put the pork bones and wings in the oven for 40 minutes, at 375 degrees Fahrenheit, with 2 tablespoons of olive oil.

Pork bones and chicken wings
At the same time the meat is cooking, cut the potatoes, carrots, onions and the green tip as well as the very white part of the scallions. As these vegetables will not be eaten, simply wash them: besides the onions, there is no need to peel them and they can be cut in large pieces. Put the bones and the veggies in a large pot, cover with water, add 1/2 tablespoon of salt and cook on medium heat for 4 hours.
Note: you will have enough broth for 8 servings and can freeze whatever you do not use.

Scallions
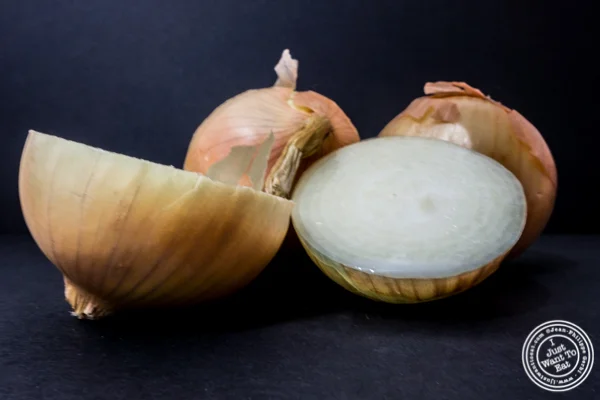
Onions
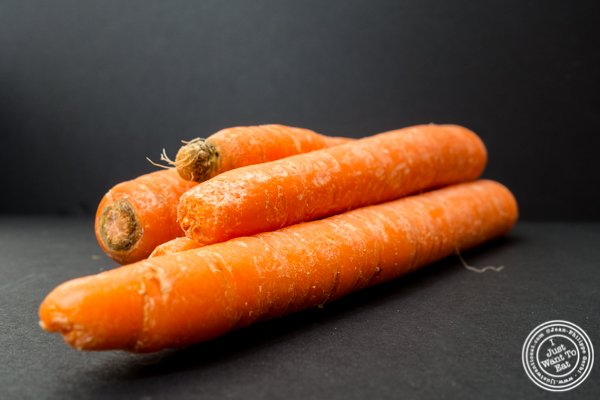
Carrots

Scallions

Russet potatoes

Chicken and pork broth
Step 2: braise the pork belly
When I received the pork belly I ordered, it was cut into three slabs. So I put each slab 1/2 inch from each other and rubbed them with a mix of salt (1 table spoon), gochugaru (red pepper flakes - 1 table spoon - can be found at H Mart or Amazon) and 1/3 cup of olive oil. Then, I put them into some aluminum foil that I closed, not too tight, but put enough to avoid the juice to leak as the pork, while cooking will release a bit of it.
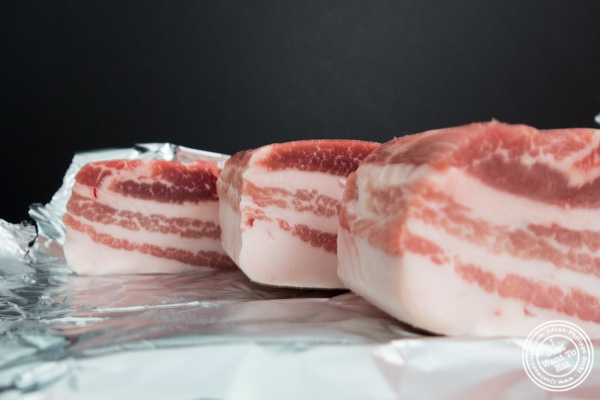
Pork belly
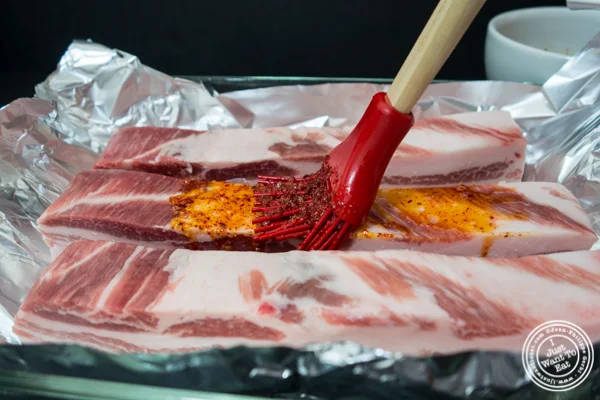
Applying the rub on the pork belly

Gochugaru

Pork belly with rub
I then roasted the pork belly for two hours in the oven at 275 degrees Fahrenheit. This slow cooking process will make the meat tender and juicy. If you have a bigger slab of pork belly, cook it longer at a slightly lower temperature. After two hours, you have perfectly cooked pork that you will slice evenly:

Pork belly

Sliced pork belly
Note: do not throw the red juice that has been rendered by the pork belly (fat in fact), we will use it later.
Step 3: prepare the eggs marinated in soy
If there is one component I sure want to make is the egg as I always order an egg when eating ramen. It has to not be fully cooked, with a runny yolk. To obtain such result, I cooked the eggs for 6 minutes exactly, putting them as soon as the water was boiling and then dipping them in a bowl with ice and water so they stop cooking immediately. I then removed the shell.

Boiling the eggs

Putting the eggs in ice and cold water

Remove the shell from the egg
Then, I used one of the measuring cups I have and dropped 1 tablespoon of mirin wine as well as 4 packets of soy sauce (equivalent to 1 tablespoon). I then put the eggs in the cup and added water to cover them. To keep the eggs immersed in the marinade, I used a spoon as showed below. I then refrigerated the eggs for 2 hours.

Egg marinated

Egg marinated
Et Voila! A perfectly runny yolk and a nice color on the whites thanks to the marinade (the longer it sits in the refrigerator, the more the whites will change color.

Egg with runny yolk

Egg with runny yolk
Step 4: prepare the tofu
As Jodi does not like pork belly, I prepared some tofu for her. I used some silky tofu as the firm one is not that great in term of taste, but on the other hand, this is way more fragile and breaks easily. I put some oil in a pan with some garlic and gochugaru (red pepper flakes - 1 tablespoon). As soon as the garlic started to get brown, I added the tofu that I cooked at high heat for approximetely 6 minutes, using a spoon to drench the top with the hot oil, as there was no way I could flip the tofu without creating a mess.

Silken tofu

Silken tofu with gochugaru
Step 5: finish the pork belly
The last step with the pork belly will be to first fry it in a pan at high heat for 2 minutes on each side. Then, in another pan, put the equivalent of 2 garlic cloves, 1/2 table spoon of ginger and 1/3 cup of vegetable oil. Once the garlic starts to brown, put the pork belly juice set aside previously, 1/8 cup of rice vinegar and 1/8 cup of spring roll sauce. Cook for 25 minutes on medium heat, until the sauce caramelizes and the pork belly gets a bit of a char.

Garlic and ginger
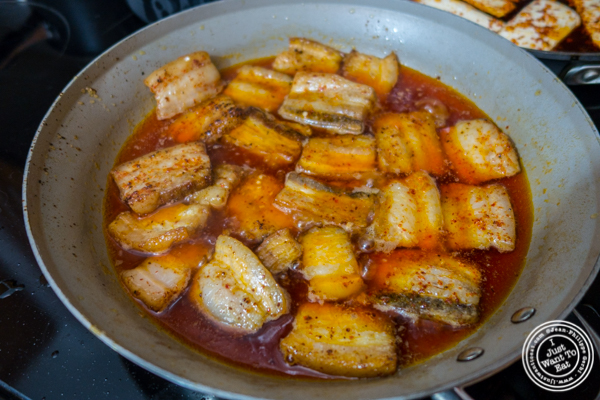
Cooking pork belly
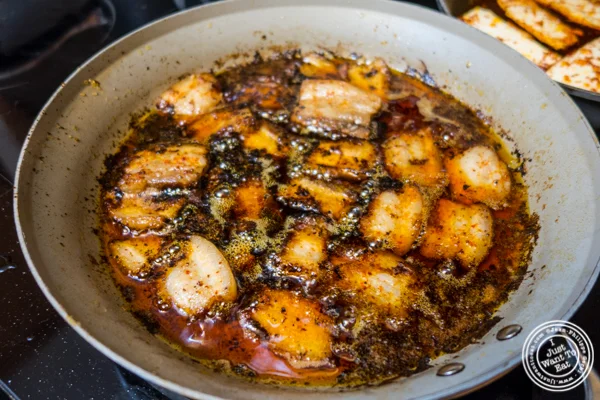
Cooked pork belly
Step 6: strain the broth
After 4 hours, strain the broth; I use a cheese cloth that will make sure I will have a totally clear broth.

Straining the broth with a cheese cloth

Pork and chicken broth

Pork and chicken broth
Step 8: cook the egg noodles for 2 minutes
I decided not to make the egg noodles but to buy them at a supermarket in Chinatown (cheap: 99 cents!). I used 3 of the noodle stacks, that I put in boiling water for 2 minutes.

Egg noodles
Step 9: assemble the ramen
Put 1/2 cup of cabbage, some scallions, corn, noodles and tofu or pork belly in a bowl.

Ramen with tofu
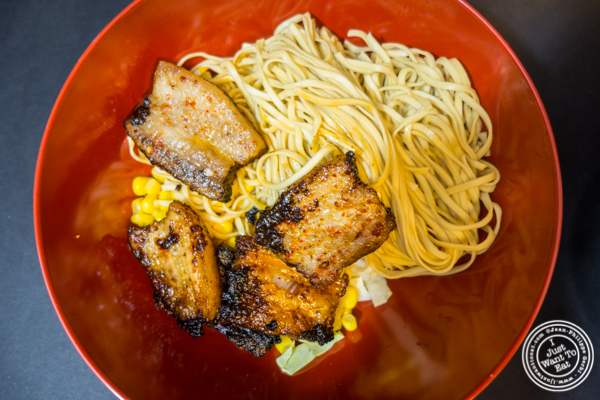
Ramen with pork belly
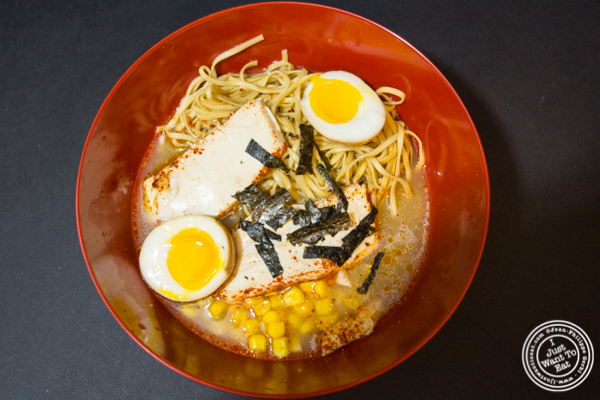
Then, put 2 table spoons of white miso paste in 2 cups of broth and mix thoroughly. Split the mix between the two serving bowls and then add as much broth as necessary in each of them. Cut the eggs in half and put them on top, as well as some seaweed. Et voila: it is ready!

Ramen with pork belly

Ramen with tofu

Ramen with pork belly
Ramen with tofu
Bon appétit!
If you like this post, the photos or the blog, please feel free to share it or post a comment. Merci!

Recipe: S'Mores pie or should I say S'Mornies?
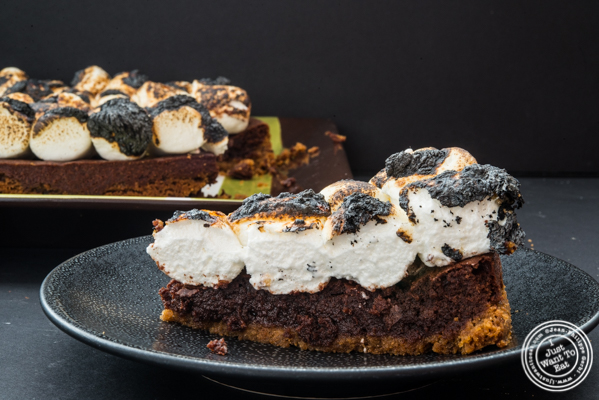
I discovered S'Mores in this country, this treat not being known at all in France. Even roasting marshmallows, that we call chamallows, is pretty uncommon there. So, I decided to make my own version of a S'Mores pie, layering a Graham cracker crust, a fudgy brownie and some torched marshmallow. An easy recipe that will satisfy adults and kids!
S'Mores pie recipe
I discovered S'Mores in this country, this treat not being known at all in France. Even roasting marshmallows, that we call chamallows, is pretty uncommon there. So, I decided to make my own version of a S'Mores pie, layering a Graham cracker crust, a fudgy brownie and some torched marshmallow. An easy recipe that will satisfy adults and kids!
Time: 1h
Servings: 10
Ingredients:
Graham cracker crust:
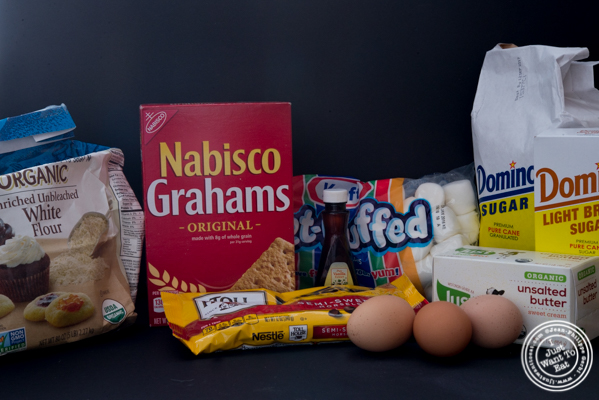
S'Mores pie recipe: ingredients
- 15 Grahams finely crushed
- 1/3 cup light brown sugar
- 8 table spoons of butter
Brownie:
- 1/2 cup granulated sugar
- 1/3 cup light brown sugar
- 340g or 12 oz semi-sweet chocolate chips or morsels
- 10 table spoons of butter
- 3 eggs
- 80 g all purpose flour
- 1 tea spoon of vanilla extract
And a bag of marshmallows.
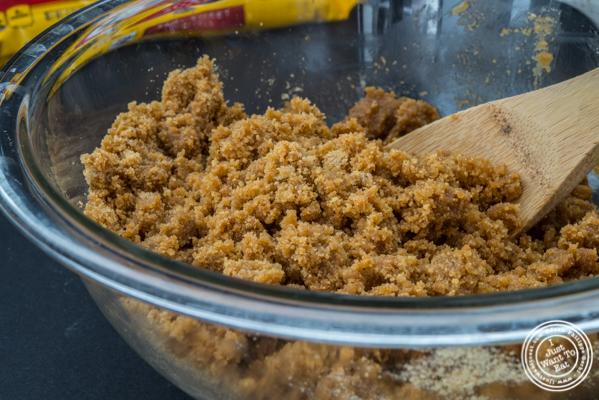
Step 1: prepare the Graham cracker crust
Finely coarse 15 Graham crackers in a food processor. Then add the butter previously melted in the microwave and the light brown sugar. Mix it thouroughly to make sure that all the ingredients are fully integrated.

S'Mores pie recipe: Graham crackers in the food processor

S'Mores pie recipe: preparing the Graham cracker crust

S'Mores pie recipe: grinding Graham crackers
S'Mores pie recipe: Graham cracker crust
Melt two tablespoons of butter in the microwave and spread inside your cake mold. Then pour the Graham cracker mix and flatten it to the bottom with the bottom of a glass.

S'Mores pie recipe: Graham cracker crust
Step 2: prepare the brownie
In a pan, melt on medium heat the chocolate morsels and the butter. Once melted, let it rest for 10 minutes. Then, add the eggs, the light brown sugar, the sugar and the vanilla extract. Once all the ingredients are fully incorporated, add the flour and mix completely, until the flour is well integrated in the chocolate batter.

S'Mores pie recipe: melt chocolate and butter

S'Mores pie recipe: making the brownie batter

S'Mores pie recipe: chocolate and butter melted

S'Mores pie recipe: brownie batter
Then, pour the brownie batter on top of the Graham cracker crust and make sure it is even in the mold.

S'Mores pie recipe: brownie batter poured on top of the Graham cracker crust
Step 3: bake
Preheat the oven to 350 degrees Fahrenheit. Then bake the pie for 30 minutes.

S'Mores pie recipe: the pie is baked
Once cooked, remove from the oven and let it sit for 30 minutes.
Step 4: Toast the marshmallow
Put the marshmallow on top of the pie and toast them using a torch.

S'Mores pie recipe: torching the marshmallow

S'Mores pie recipe: torching the marshmallow
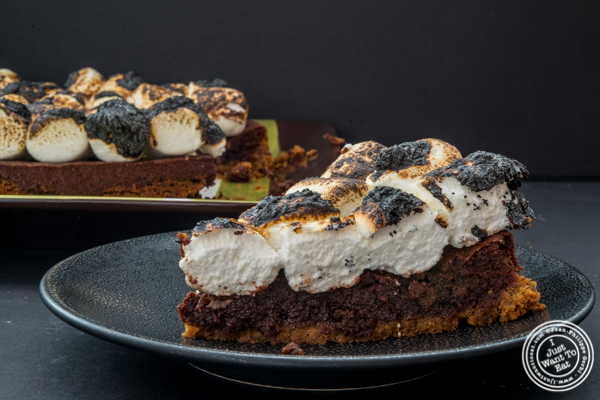
Et voila!

S'Mores pie recipe
Bon appetit!
If you like this post, the photos or the blog, please feel free to share it or post a comment. Merci!
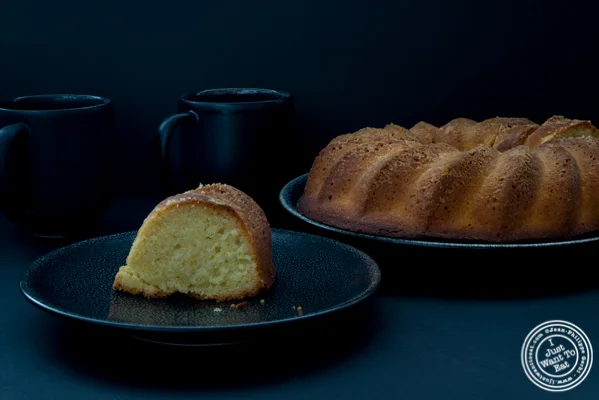
Recipe: Olive Oil Cake
I discovered olive oil cake a couple of years ago, eating in an Italian restaurant. Since then, I never hesitate to order it for dessert, often preferring it to the popular tiramisu. And in fact the best olive cake I ate, that inspires this recipe, was at Maialino. So, I decided to make my own: an easy recipe for a succulent cake...
Time: 2h
Servings: 10
Ingredients:
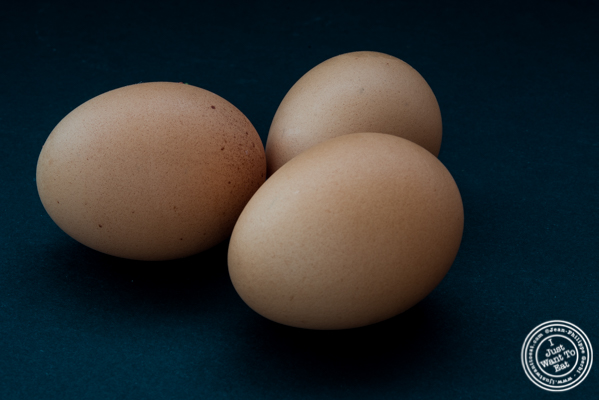
Recipe: Olive Oil Cake - eggs
- 2 cups of white flour
- 1 1/2 cup of extra virgin olive oil
- 1 cup of whole milk
- 1 cup of granulated sugar
- 2 Meyer lemons (1 1/2 for the zest and both for the juice).
- 3 large eggs
- 1 teaspoon of salt
- 1/2 teaspoon of baking soda
- 1/2 teaspoon of baking powder
Step 1: prepare the lemon juice and zest

Recipe: Olive Oil Cake - Meyer lemon

Recipe: Olive Oil Cake - Meyer lemon
I use Meyer lemons that are sweeter and less acidic than the usual lemon variety we know. First, I grate the zest of 1 1/2 lemon and then, I will press both lemons to get the juice, removing the seeds (Meyer lemons can have close to 10 seeds).
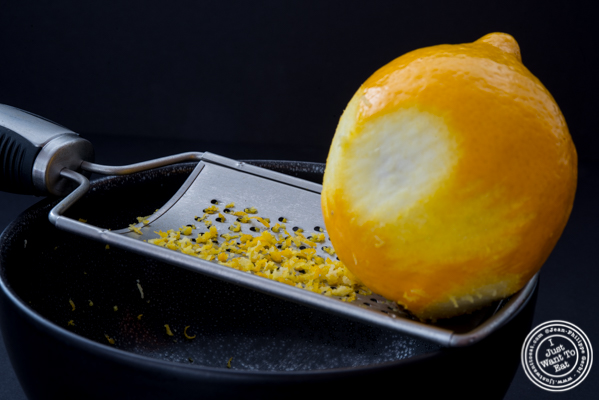
Recipe: Olive Oil Cake - Meyer lemon zest
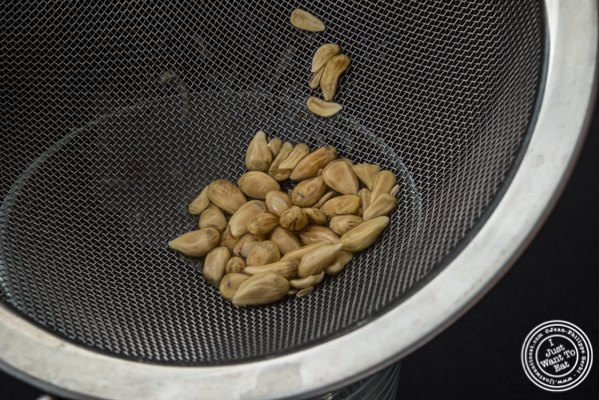
Recipe: Olive Oil Cake - Meyer lemon seeds
Step 2: prepare the batter
In a bowl, mix the flour, the salt, baking powder, baking soda and sugar.
In another bowl, whisk the eggs, olive oil, lemon juice and zest, and milk. Mix slowly the dry ingredients until fully incorporated.
Pre-heat the oven at 350 degrees Fahrenheit.
Melt some butter and spread generously in a cake mold. Then, put a thin coating of flour on the walls of the cake mold, so the cake does not stick.
Pour the batter into the cake mold.

Recipe: Olive Oil Cake - ready to cook
Cook for 1h30 in the oven, until the crust is golden brown. Then remove the cake from the oven and let it cool for 30 minutes before removing it from the mold.
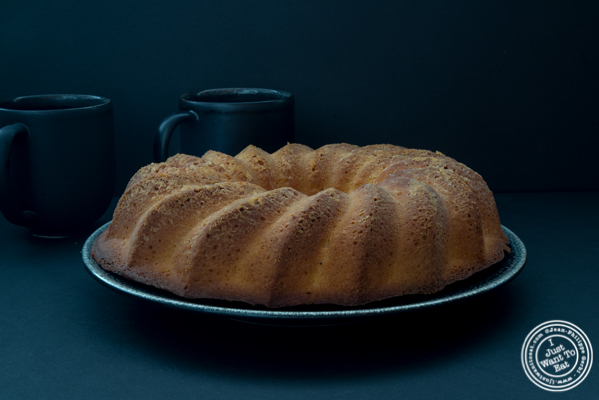
Recipe: Olive Oil Cake
Bon appétit!
If you like this post, the photos or the blog, please feel free to share it or post comments! Merci!
Recipe: Meatballs with Orzo
This is a simple recipe for a dish that is very comforting: meatballs with orzo (that we call in French langues d'oiseaux or birds' tongues because of their shape).

Recipe: Meatballs with Orzo
This is a simple recipe for a dish that is very comforting: meatballs with orzo (that we call in French langues d'oiseaux or birds' tongues because of their shape).
Time: 2h
Servings: 4
Ingredients:
- One pound ground turkey
- One pound beef (80 /20)
- 1 cup of orzo
- 5 carrots
- 1 1/2 cup peas
- olive oil
- 1 bottle of guiness
- salt & pepper
Step 1: preparation of the vegetables
Well, the main preparation will be for the carrots that should be cut in small cubes. As you can see, I used frozen peas that I found very practical compared to canned ones or even fresh ones.
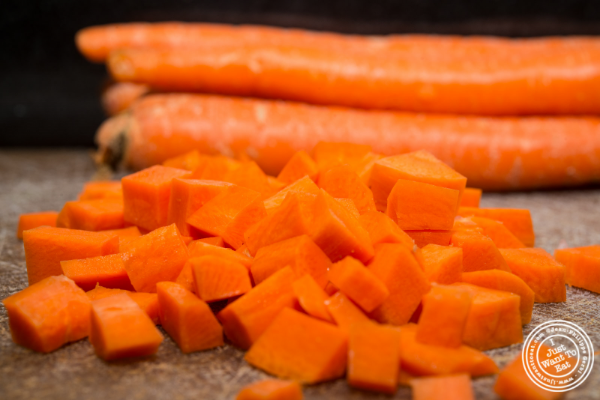
Recipe: Meatballs with Orzo - carrots

Recipe: Meatballs with Orzo - peas
Step 2: preparation of the meatballs
Similar to my burgers, I prepare meatballs simply with salt, pepper and...a bit of guiness!

Recipe: Meatballs with Orzo - using Guiness for making meatballs

Recipe: Meatballs with Orzo - meatballs
I will add the beer until fully incorporated in the meat (approximately half the bottle goes and you know what to do with the rest...). In a pan, on medium heat, I will sear the meatballs (cook them quickly on each side, turning them from time to time so each side is seared.

Recipe: Meatballs with Orzo - searing the meatballs

Recipe: Meatballs with Orzo - searing the meatballs
Step 3: cooking
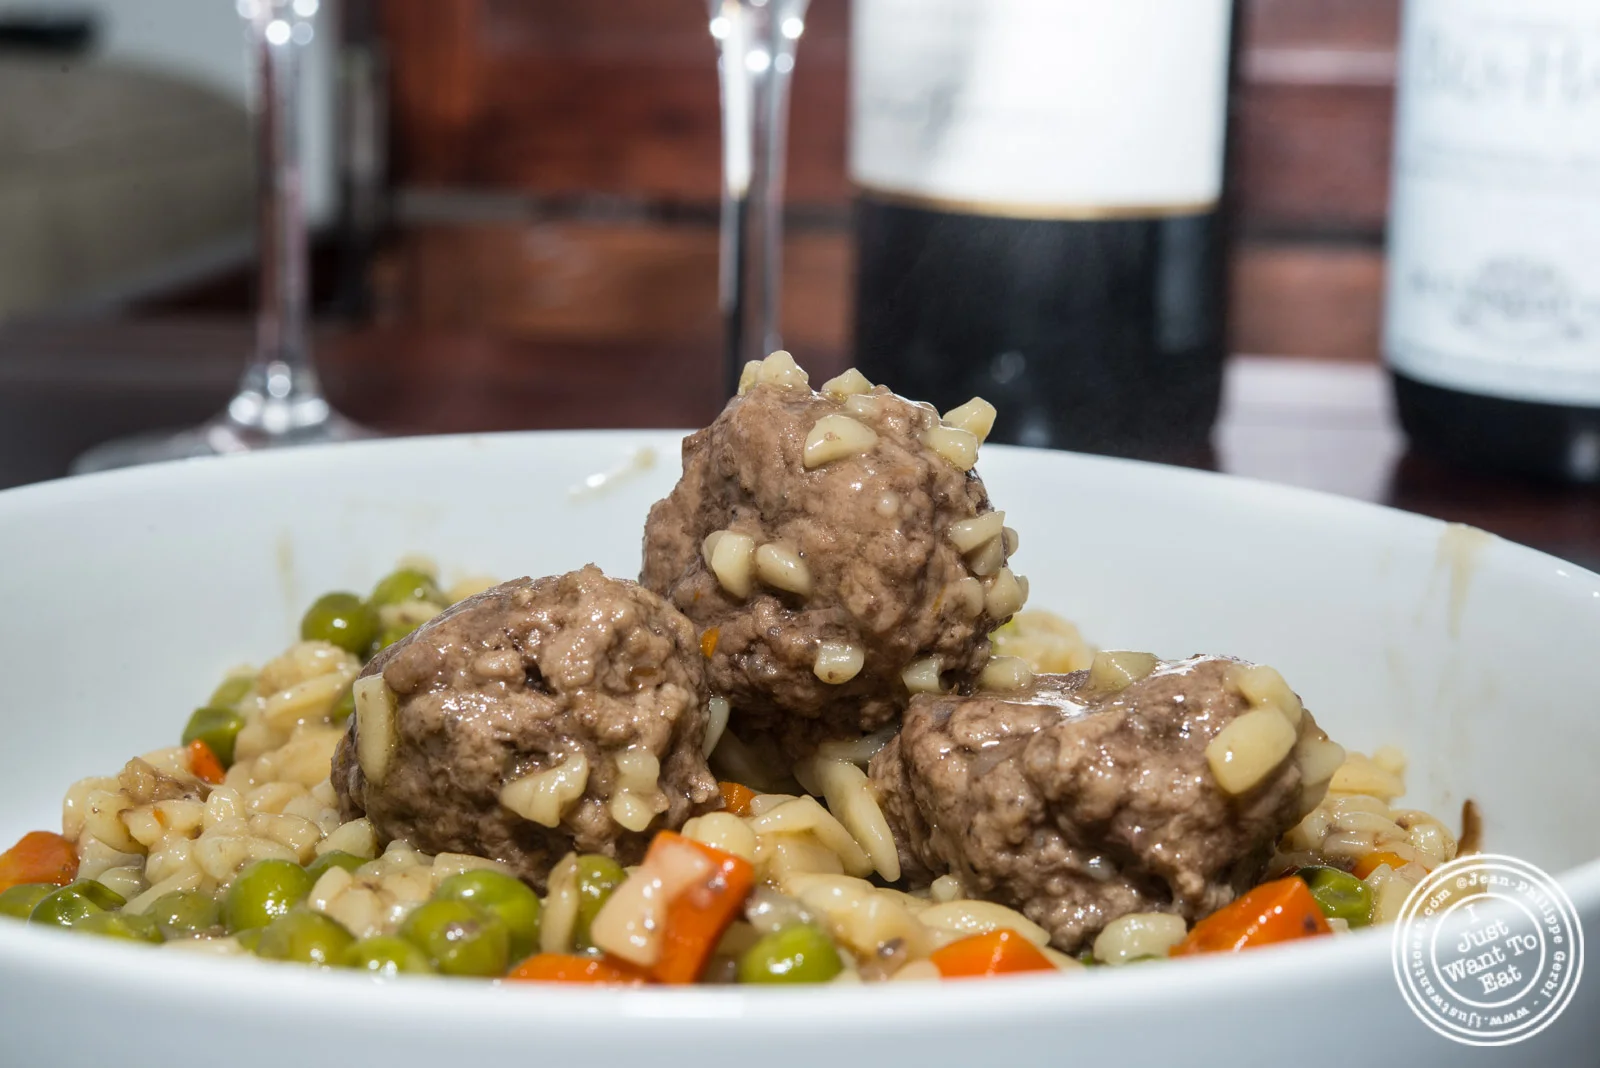
Put the meatballs in a dutch oven. Add salt, pepper, the orzo, the carrots and the peas. Add water until all the ingredients are covered and cook at medium heat. Cook until the water evaporates.

Recipe: Meatballs with Orzo - cooking

Recipe: Meatballs with Orzo - cooking
Et Voila:
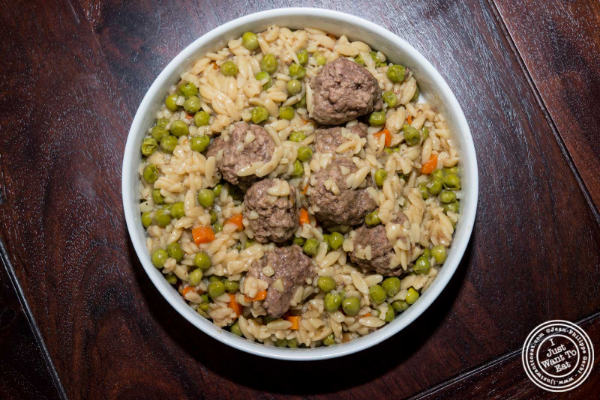
Recipe: Meatballs with Orzo
Bon appétit!
If you like this post, the photos or the blog, please feel free to share it or post comments! Merci!

Recipe: Chocolate Chip Pancakes
I remember that when I was a kid, I used to see TV series or movies where people were making pancakes, wondering what it was, as we did not have that in France. In all cases, I would definitely not say that crepes are like pancakes and it makes me cringe when I hear people comparing the two as they are totally different!
Anyway, here is the way I make pancakes at home.

Chocolate Chip Pancakes
I remember that when I was a kid, I used to see TV series or movies where people were making pancakes, wondering what it was, as we did not have that in France. In all cases, I would definitely not say that crepes are like pancakes and it makes me cringe when I hear people comparing the two as they are totally different!
Anyway, here is the way I make pancakes at home.
Time: 1h30
Servings: 8 pancakes
Ingredients:
- 2 cups all-purpose flour (or 1 cup all-purpose flour and 1 cup whole wheat flour for the health conscious...)
- 2 tablespoons powdered sugar
- 2 teaspoons baking powder
- 1 teaspoon baking soda
- 1 teaspoon salt
- 2 large eggs
- 2 cups buttermilk
- 2 tea spoons vanilla extract
- ¼ cup olive oil
- 12 oz semi-sweet chocolate chips (I use Nestlé or Guittard)
Step 1: preparation of the batter:
In a bowl, mix the flour, salt, sugar, baking powder and baking soda. In another bowl, beat the eggs with the vanilla extract and then add the olive oil and buttermilk. Stir well until all the ingredients are well mixed in. Then, add slowly the mixture with the flour, making sure that there is no large lumps.
Let it rest for 1 hour, then mix the chocolate chips in the batter.

Preparation for Chocolate Chip Pancakes

Preparation for Chocolate Chip Pancakes

Batter for Chocolate Chip Pancakes

Batter for Chocolate Chip Pancakes
Step 2: cooking the pancakes
Heat a pan or a griddle on medium heat (I use a crepe maker) and brush with canola oil. Pour some of the batter, making sure to leave enough space between each pancakes. Flip the pancake once it is golden brown and remove from heat once both sides have been cooked. Et voila!

Cooking Chocolate Chip Pancakes

Cooking Chocolate Chip Pancakes

Chocolate Chip Pancakes

Chocolate Chip Pancakes
Bon appétit!
If you like this post, the photos or the blog, please feel free to share it or post comments! Merci!
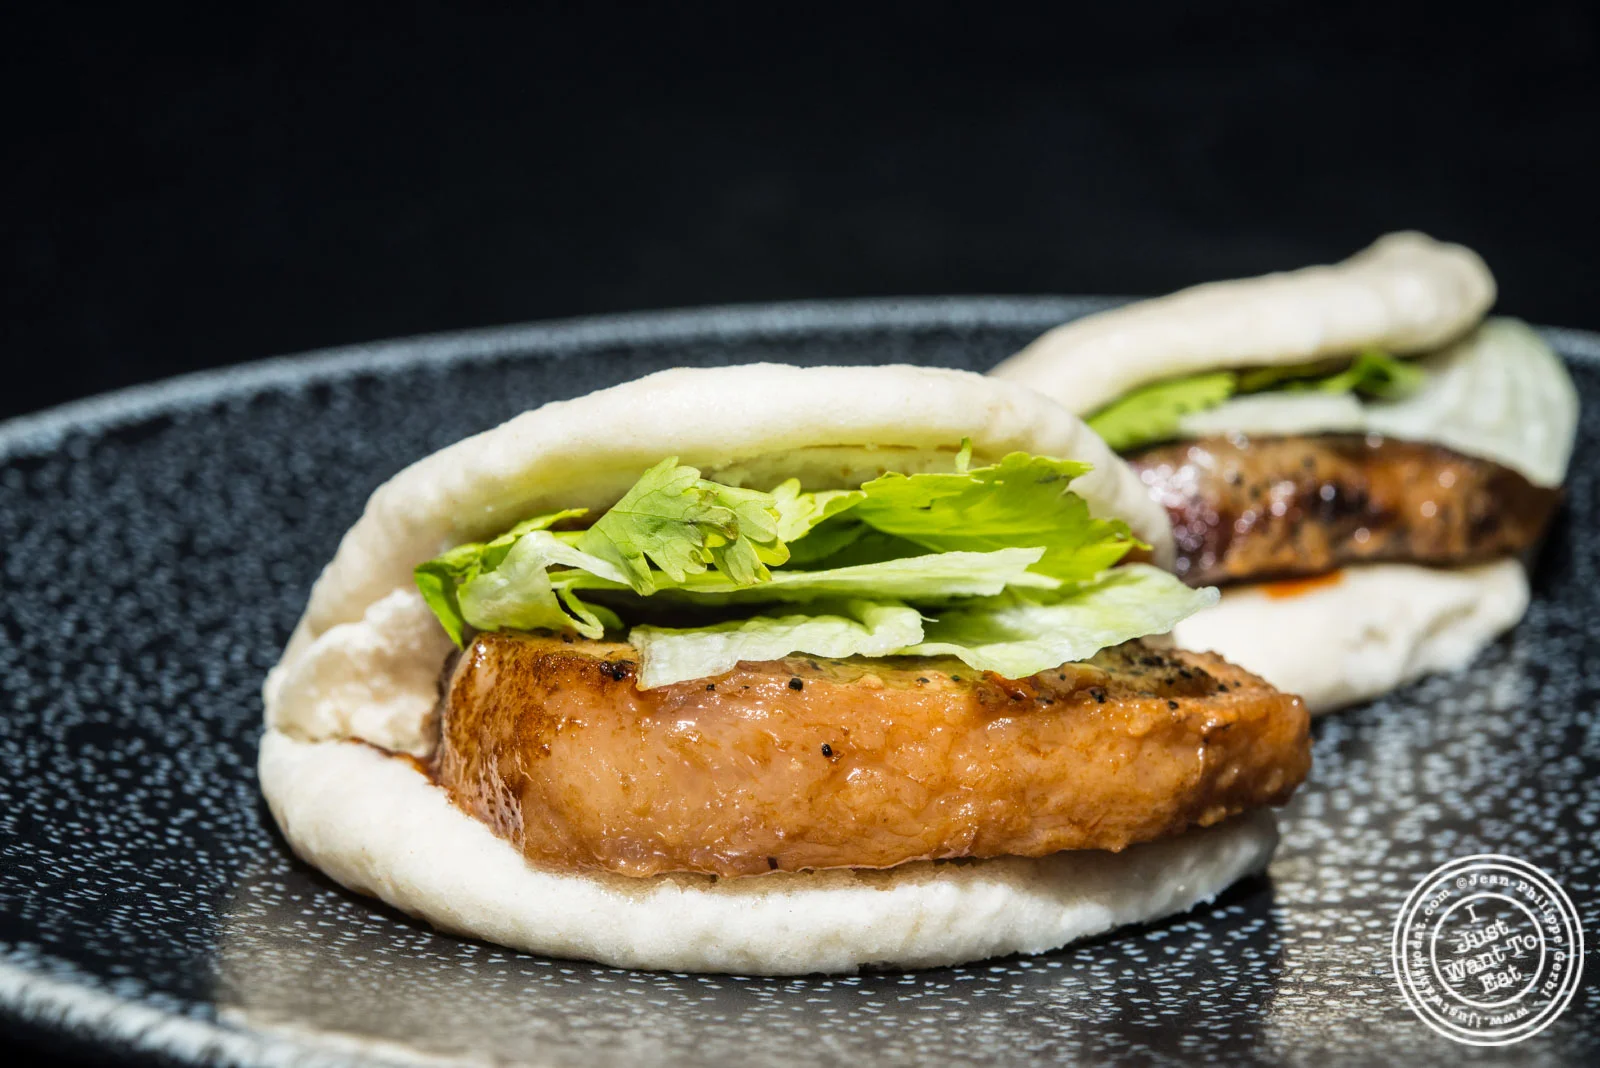
Recipe: Pork Belly and Tofu Bao (buns)
I love BAO, these steamed buns of all sorts of shapes that you can find in Chinese restaurants. I love it so much that I was curious to know how to make it and decided to try myself. I made two versions: pork belly for me and tofu for Jodi (not entirely vegetarian as it contains fish sauce). It is not that this recipe is complicated, but it takes some time.


I love BAO, these steamed buns of all sorts of shapes that you can find in Chinese restaurants. I love it so much that I was curious to know how to make it and decided to try myself. I made two versions: pork belly for me and tofu for Jodi (not entirely vegetarian as it contains fish sauce). It is not that this recipe is complicated, but it takes some time.
Time: 3 hours
Ingredients:
For the buns:
- bun flour (Bot banh bao - bought on the internet - it is available on Amazon)
- 1/2 cup whole milk
- 1 tbsp vegetable oil
For the pork belly:
- 2 lb pork belly
- 2 tbsp coarse salt
- 2 tbsp pepper
For the marinade:
- 1/4 cup rice vinegar
- 1/4 cup spring roll sauce (sweetness to counterbalance the vinegar)
- 1/8 cup soy sauce
- 1/2 cup water
- 4 green onions
- 2 tbsp garlic
- 1 tsp powdered ginger
For the garnish:
- Hoisin sauce
- cilantro
- iceberg lettuce
Step 1: Roasting of the pork belly - 2h15

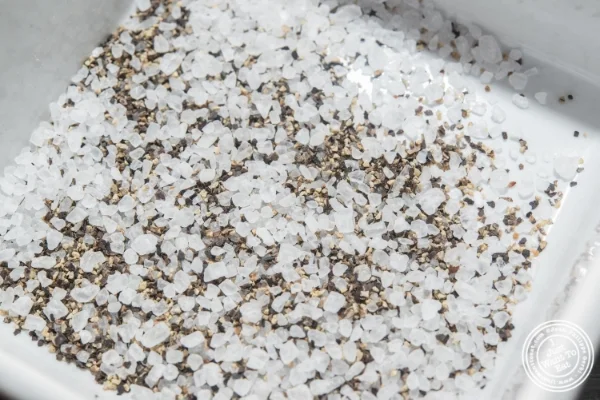


When I received the pork belly I ordered, it was cut into three slabs. So I put each slab 1/2 inch from each other and rubbed them with a mix of salt and pepper. Then, I put them into some aluminum foil that I closed, not too tight, but put enough to avoid the juice to leak as the pork, while cooking will release a bit of it.
I then roasted the pork belly for two hours in the oven at 275 degree Fahrenheit. This slow cooking process will give a tender and juicy meat. If you have a bigger slab of pork belly, cook it longer at a slightly lower temperature. After two hours, you obtain a perfectly cooked pork that you will slice evenly:


Step 2: preparation of the marinade


Cut the green onions in small even pieces (you will use the white and light green part of the onion). In a saucepan, sauté the onions, the garlic and the ginger, mixing with a spoon and making sure it does not burn. When the garlic starts to be brown, remove from the heat.
In a bowl, put the rice vinegar, spring rolls sauce, soy sauce, water and the mixture of onions and garlic you just prepared. Mix all the ingredients together.
Step 3: sauté the tofu and pork belly


In a saucepan, sauté some slices of tofu in olive oil, at high heat, flipping them after 5 minutes.
In another saucepan, do the same with the pork belly, but flip the slices once brown. They will release some fat that will be used later.
Step 4 - Marinate the pork belly and tofu


Pour half of the marinade in each pan, cover and cook at lo heat for 25 minutes.
Step 5 - Making the buns


To make the buns, I simply followed the recipe on the package:
In a bowl, pour the milk and vegetable oil, add slowly the flour and mix with your hand for 10 minutes until obtaining a firm dough. Let it rest for 15 minutes and then knead for 5 more minutes.
Flatten the dough with a rolling pin. Cut the dough in a round shape with a glass or bowl and flatten again with a rolling pin. Fold delicately in half and put on a piece of wax paper. With the packet of flour, you will make approximately 12 buns. Put in a steamer (i use a couscoussier) for 25 minutes. Let the buns cool for 5 minutes.

Step 6: Serve!
Open the buns delicately. Spread some hoisin sauce inside, on both sides, and put a slice of pork belly or tofu, topped with iceberg lettuce and cilantro. Et voila!


Bon appétit!
If you like this post, the photos or the blog, please feel free to share it or post a comment. Merci!

Recipe: White Bean Soup
During our trip to Florence, we had some amazing Tuscan white bean soup. This recipe is inspired from it. Enjoy (I did)! and bon appétit!

White Bean Soup
This recipe is inspired by our last trip to Tuscany.
Time: 2 hours 30
Ingredients:
- 4 cans of white beans (total of 60 oz)
- 3 oz of carrots
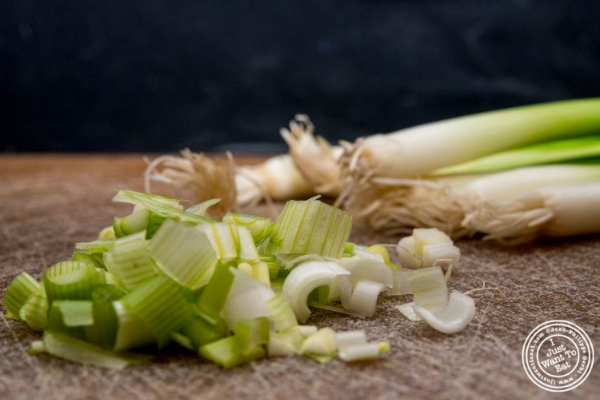
- 2 oz of celery
- 1 large onion
- 0.25 lb of pancetta
- 1 teaspoon of thyme
Preparation for the soup:

Onions for White Bean Soup

Carrots for White Bean Soup

Celery for White Bean Soup

Pancetta for White Bean Soup
Cut the onion, carrots and celery in small cubes.
Cut the pancetta in small pieces (it can be challenging, so make sure your chef's knife is well sharpened).
Put the veggies and the pancetta in a pot with olive oil, salt and pepper. Cook on medium heat until the onions are soft and golden.
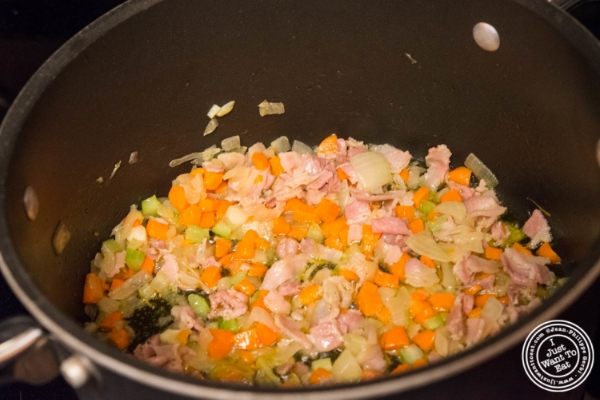
Preparation for White Bean Soup

Preparation for White Bean Soup
Add the beans, the thyme and 3 cups of water and cook for 2h30 uncovered on low heat.
Et voilà!
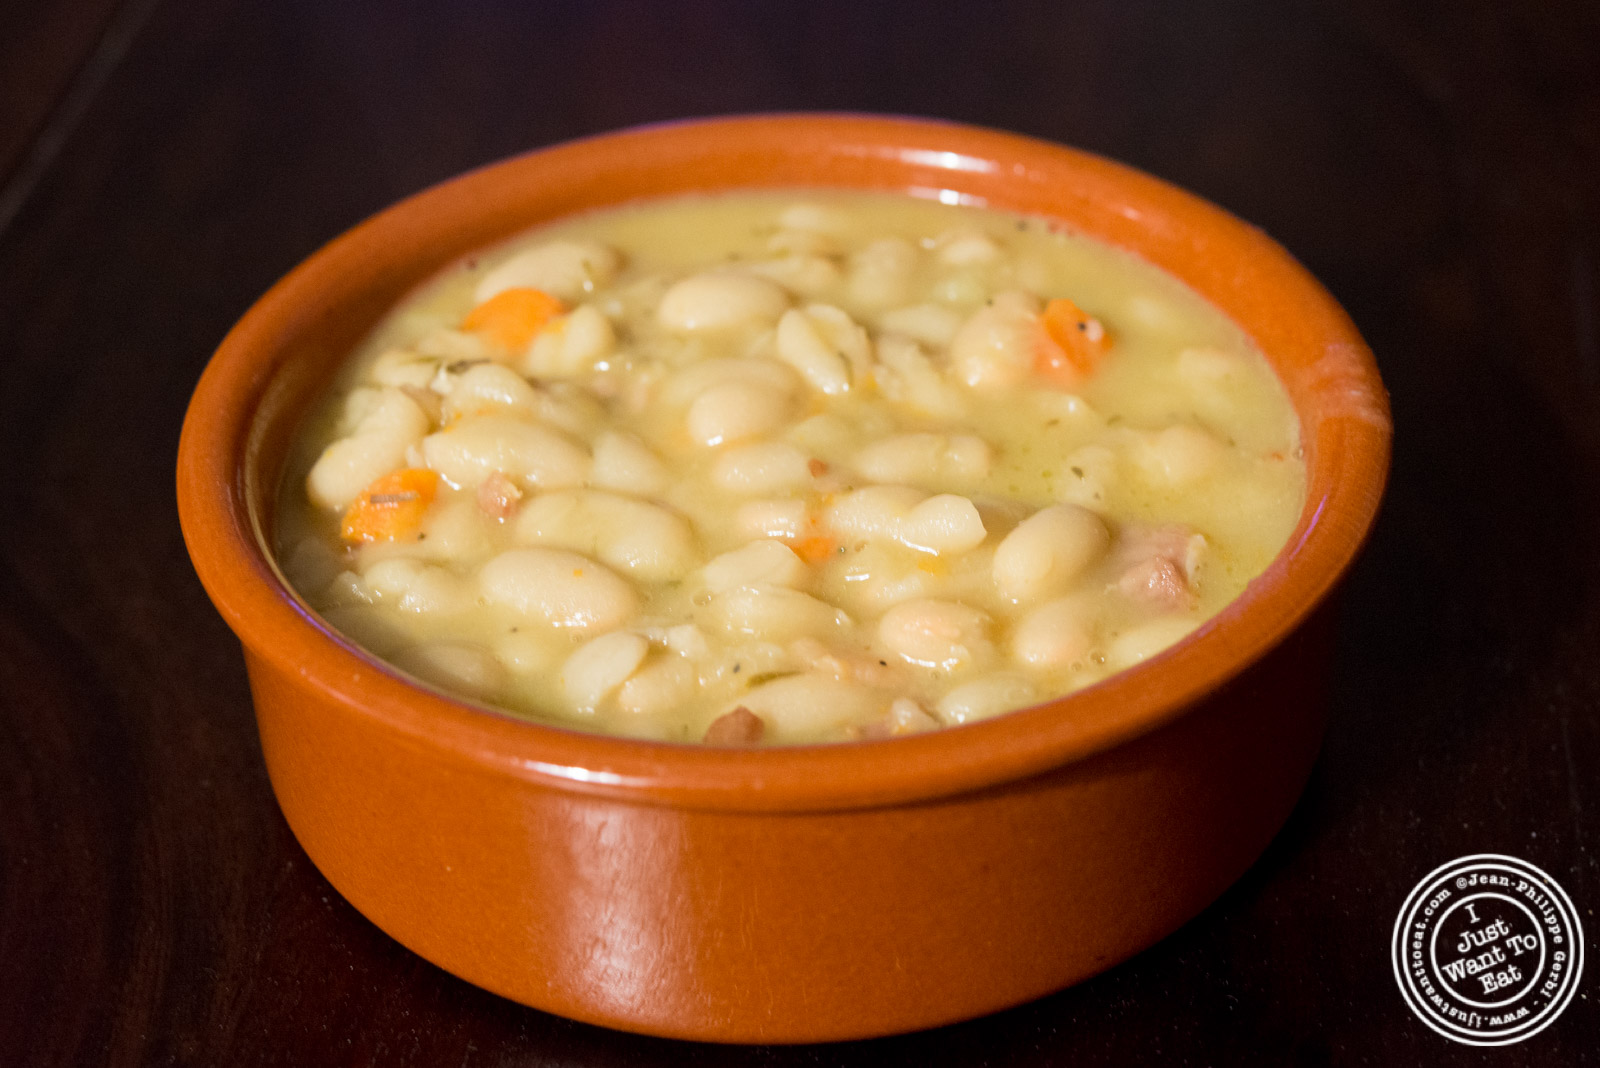
White Bean Soup
Bon appétit!
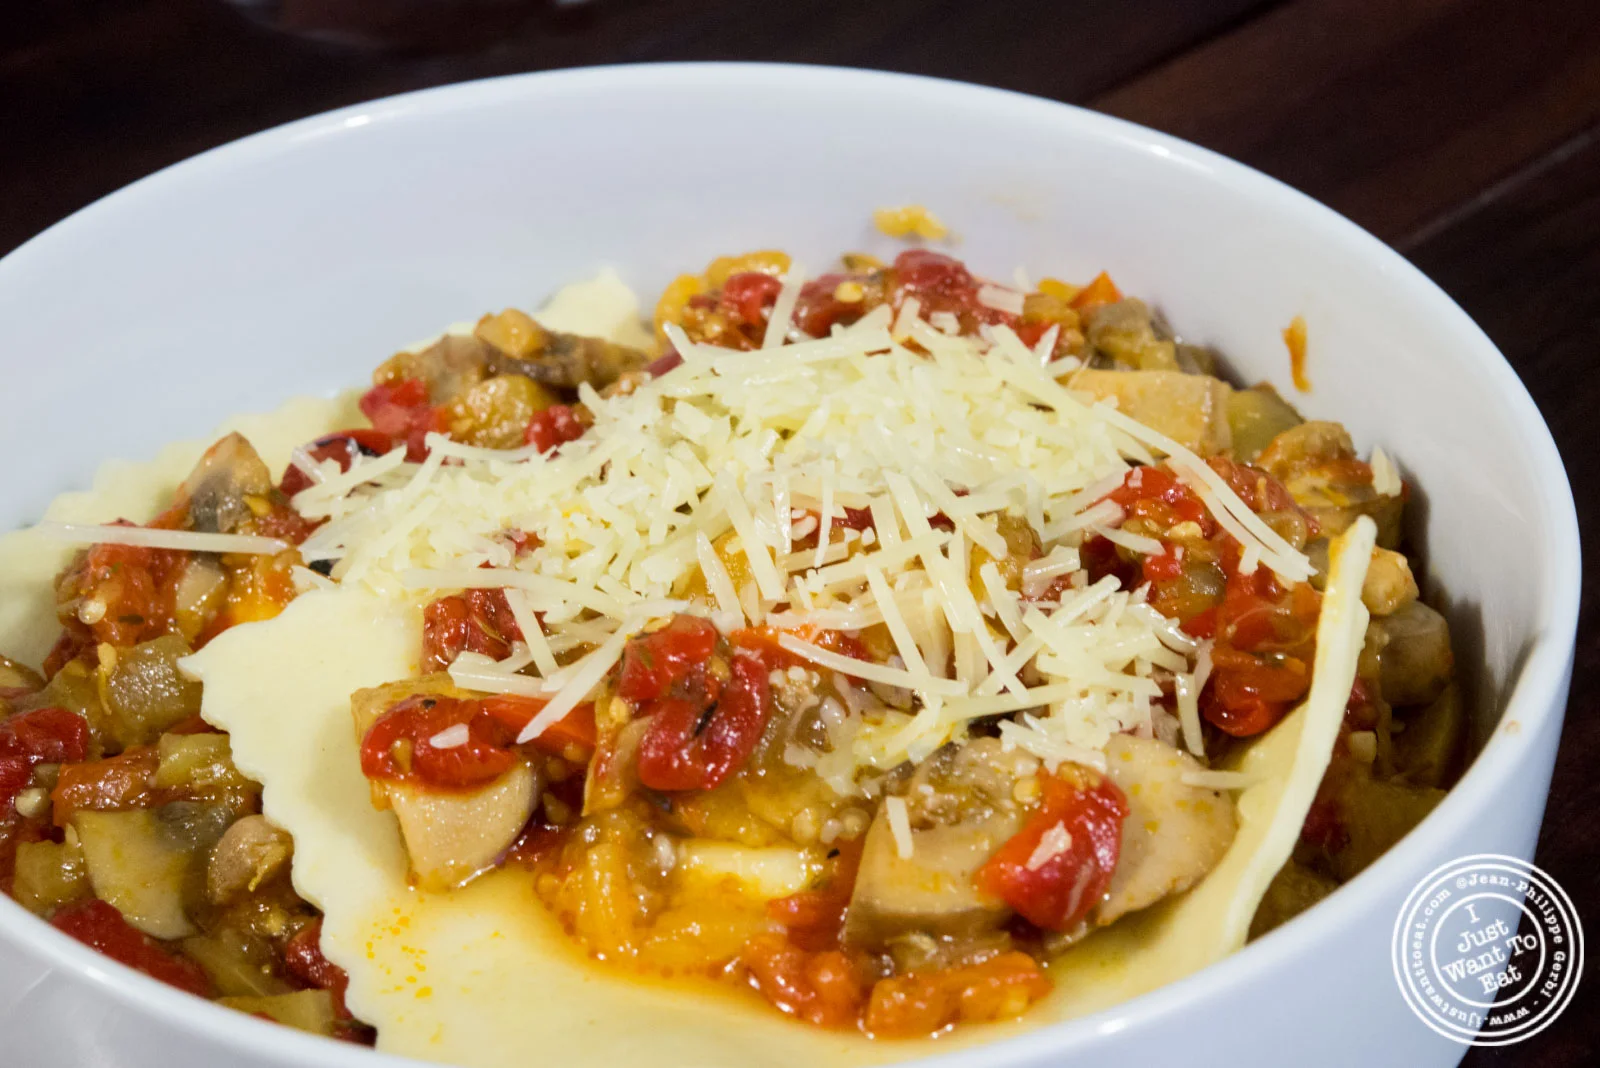
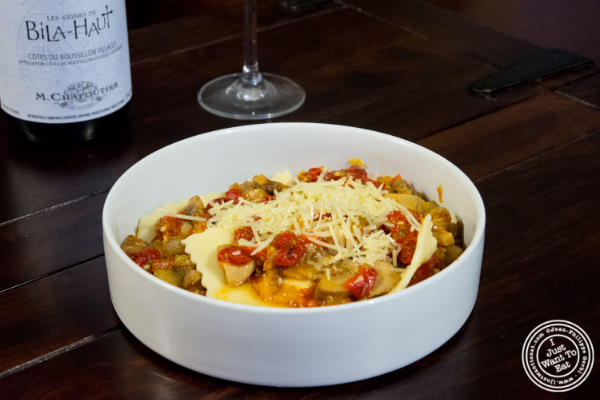
Recipe: Ricotta Ravioli With A Vegetable Stew
A very comforting pasta dish, full of veggies. You will also learn how to make ravioli!
Time: 2 hours 30 (preparation and cooking)
Ingredients for the pasta (15 ravioli approx.):
- 1 cup of all purpose white flour
- 1/2 cup of semolina flour
- A pinch of salt
- 4 large eggs
- 2 tablespoons of ricotta
Ingredients for the stew:
- 8 oz mushrooms
- 2 red peppers
- 16 oz cherry tomatoes
- 1 eggplant
- 1 teaspoon of thyme
- 2 garlic cloves
Preparation for the stew:
You first need to prepare the stew as it will cook for some time.


In a pan, put some olive oil, the garlic reduced to a purée, the vegetables cut in small pieces, the time, salt and pepper. Cook at low heat for 2hrs.
Preparation of the ravioli:


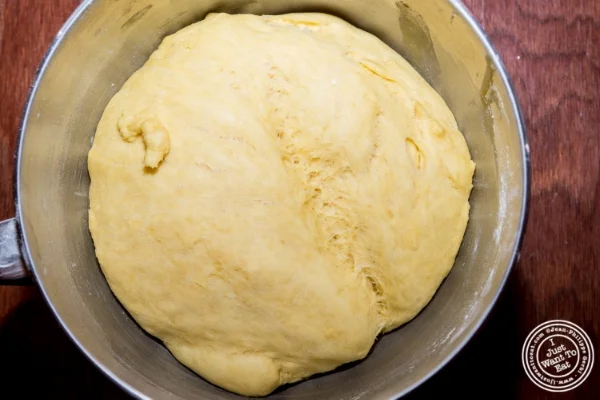
First and foremost, you need to make a pasta dough.
Put the flour, semolina and salt on a countertop. Create a well in the center and put 2 eggs. Incorporate the flower into the eggs, making a slow movement clockwise. Once the two eggs are fully incorporated, add a third one and mix. The dough has to be soft and light. If sticky, add more flour.
Note: do not knead too much as you do not want the pasta dough to be too compact.
Cut the dough in few sizable pieces. To flatten it, I use a Kitchen Aid pasta roller extension that is great, because, with a manual machine, it is easier if you are with somebody else. With the Kitchen Aid, no need. I usually flatten the dough thin, to level 6. Do not forget to put flour on your countertop before laying down the pasta strips, otherwise they will stick to it.

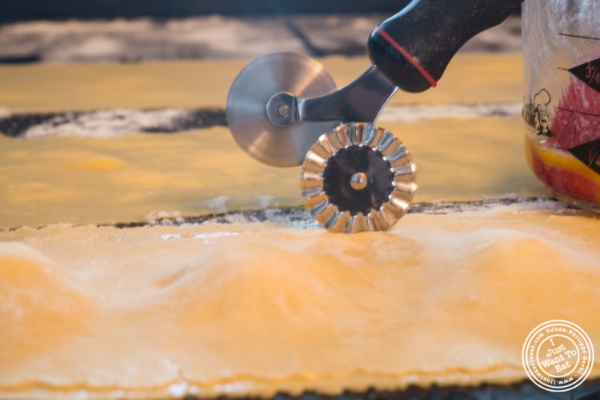


Once I have long stripes of dough, I prepare my ravioli: I cut each strip in the middle, keeping the wider piece in the bottom. I then put a bit of ricotta in the center, keeping a distance of 1 to 1.5 inches in between. Then, I will put some egg wash all around the ricotta, so the top layer of pasta will stick to the bottom. When covering the ravioli, do not forget to push the air pockets to the side (otherwise, the ravioli may burst during cooking) and to make sure each side is well closed. Then, cut the ravioli with a wheel to obtain a nice shape.
Cook the ravioli in boiling water for about 7 minutes.
Put the ravioli in a bowl and add the vegetable stew, as well as some grated parmesan cheese. Et voilà!

Bon appétit!

Recipe: Bugnes
Bugnes are some sort of beignets that are popular in Central-Eastern France, the most known being the bugnes de Lyon. There are two sorts: the soft and the crunchy, the difference between the two being the presence of yeast (soft) or not (crunchy). It is not difficult to make, but takes a bit of time as the dough has to rise.

Bugnes
Bugnes are some sort of beignets that are popular in Central-Eastern France, the most known being the bugnes de Lyon. There are two sorts: the soft and the crunchy, the difference between the two being the presence of yeast (soft) or not (crunchy). It is not difficult to make, but takes a bit of time as the dough has to rise.
Time: 3 hours
Ingredients for 50 bugnes:
- 1 lb all purpose white flour (450g)
- 4 oz of butter (125g)
- 1/2 cup powdered sugar (75g)
- confectioner sugar
- a pinch of salt
- 2 packets of yeast
- 2 drops of orange flower extract
- 4 eggs
- 1/4 cup of milk
Preparation of the bugnes:

Preparation for bugnes

Preparation for bugnes

Preparation for bugnes
Put the eggs, the milk (lukewarm), the powdered sugar and the yeast in a bowl. Mix for 5 minutes and then, let it sit for 30 minutes. Add the pinch of salt, the orange flower extract, the melted butter and then, slowly add the sifted flour, while mixing the ingredients (I use the hook in a KitchenAid mixer), until obtaining a soft dough that does not stick (you can add more flour if too sticky). Let rise for 2 hours.

Preparation for bugnes
Preparation for bugnes
On a tabletop, put a very thin layer of flour so the dough does not stick to it, and spread it with a rolling pin. Use a cutting wheel to obtain a perfect rectangle (redo this step with the discarded dough - there is no waste!).

The dough for bugnes

The dough for bugnes
The dough for bugnes
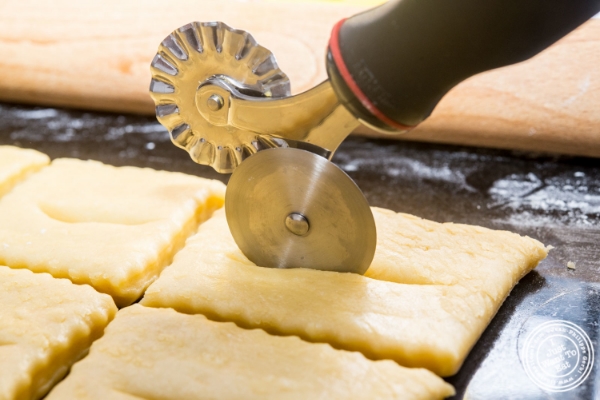
Again with the cutting wheel, cut smaller rectangles (you can even use molds if you would like a specific shape) and, in each rectangle, make a small incision.
In a frying pan, pour some vegetable oil (1 inch deep), at medium heat. Cook the bugnes in the pan, but be careful: it goes fast. What I did was to count to 5 slowly, then turn the bugne on the other side, count again to five, and then remove them, putting them directly in a bowl containing confectioners sugar. Turn the bugne in the sugar until fully coated.

Frying the bugnes

The dough for bugnes

Dipping in confectioner sugar
Et voila!

Bugnes

Bugnes

Bugnes

Bugnes
Bon appétit!
If you like this post, the photos or the blog, please feel free to share it or post a comment! Merci!
Recipe: Paella
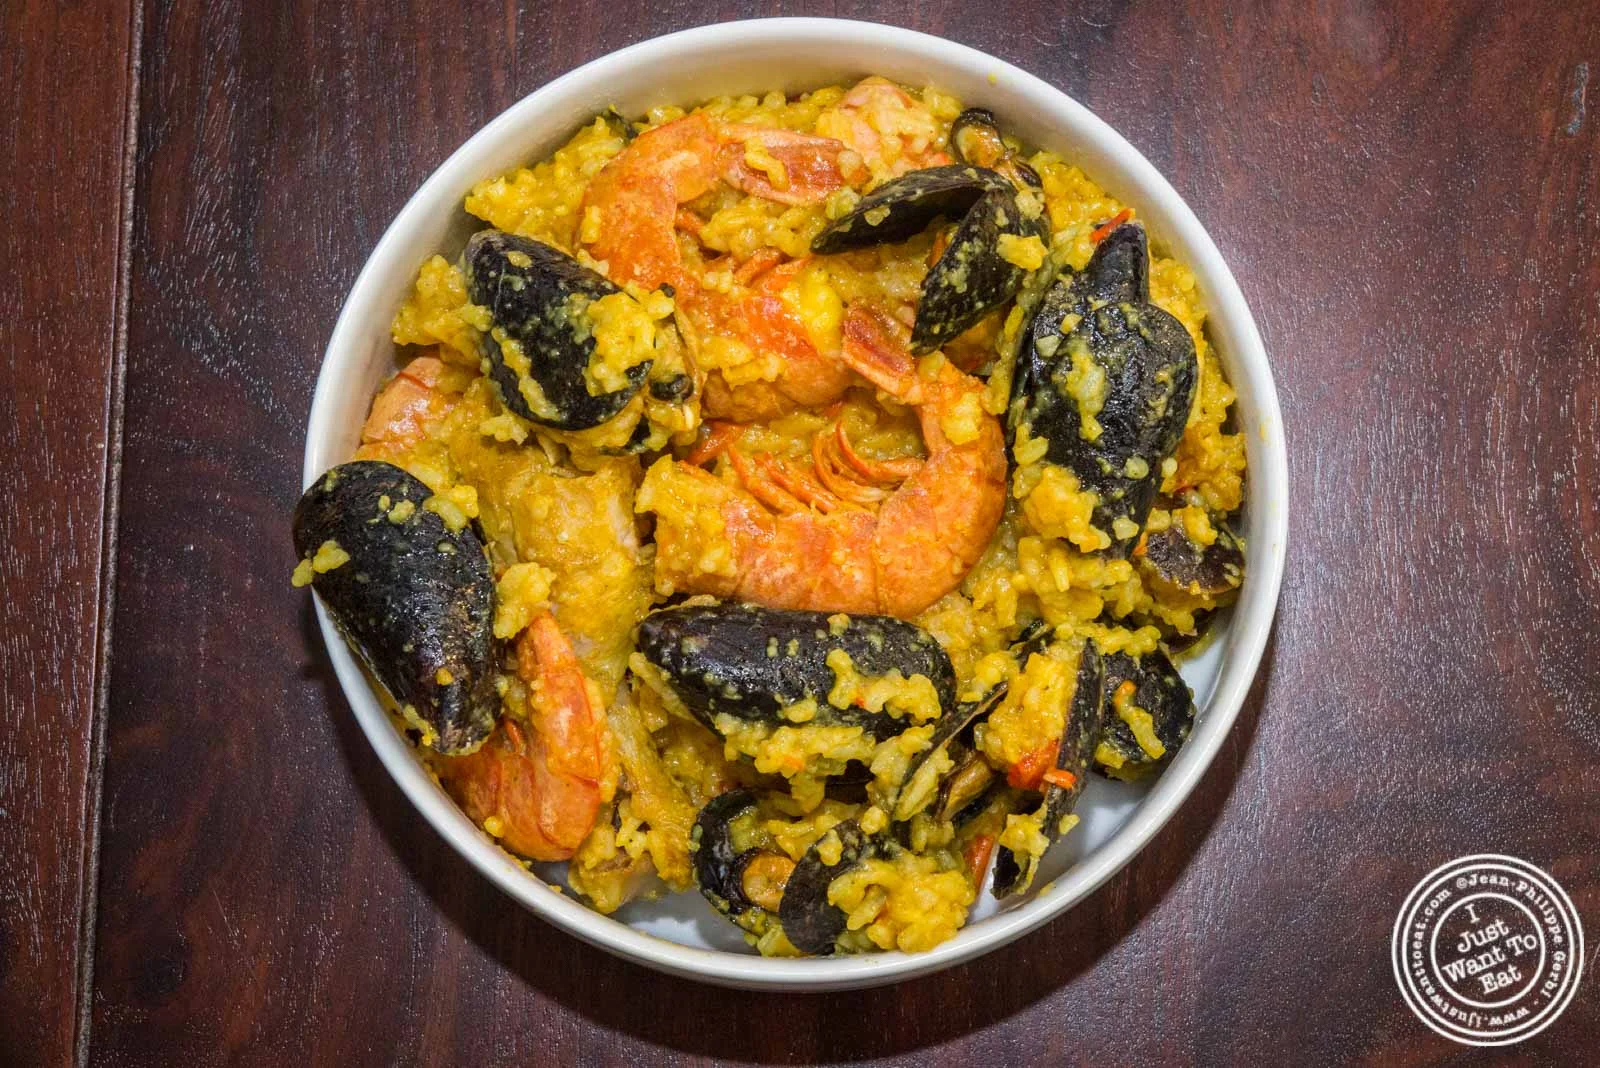
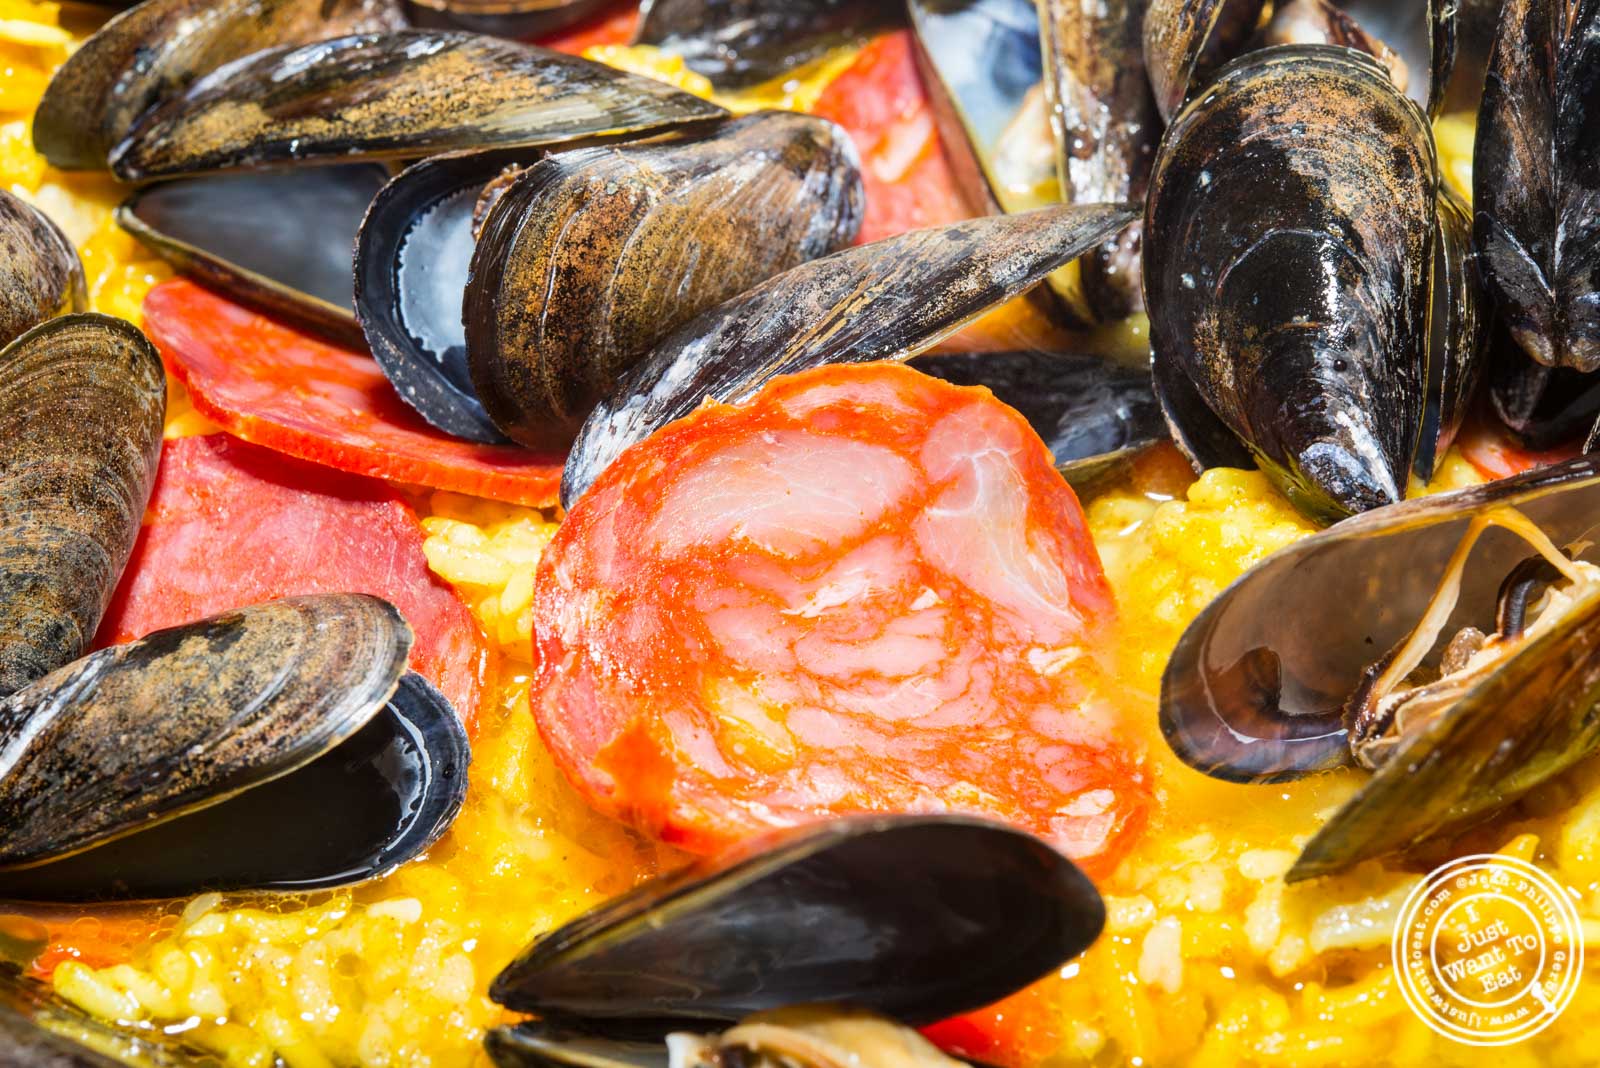
I love paella and tried to recreate my own version, made with meat and seafood and cooked for long enough so the rice gets very soft and flavorful. In this recipe, I have replaced the saffron by turmeric, to give to the rice this nice yellow color, saffron being expensive. Here is the recipe:

Recipe: Paella
I love paella and tried to recreate my own version, made with meat and seafood and cooked for long enough so the rice gets very soft and flavorful. In this recipe, I have replaced the saffron by turmeric, to give to the rice this nice yellow color, saffron being expensive. Here is the recipe:
Time: 2 hours
Servings: 4 persons
Ingredients:
- 2 cups of white rice.
- 2 tea spoons of turmeric.
- 1 tea spoon of salt.
- 6 chicken drumsticks.
- 0.125 lb chorizo cut into thick slices.
- 1 red pepper.
- 1 lb of mussels (I used Prince Edwards Island mussels).
- 0.5 lb of jumbo shrimp, shell on.
Preparation of the mussels:
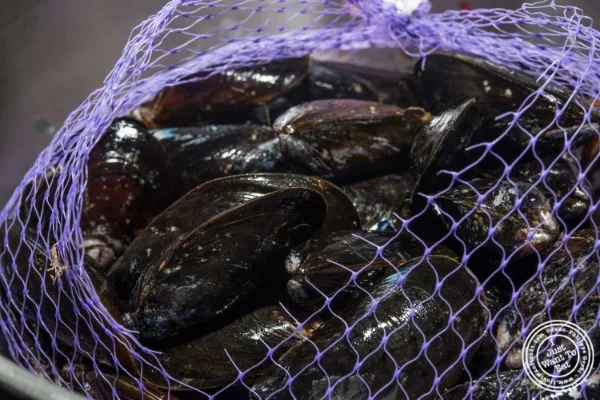
Prince Edward Island mussels

Prince Edward Island mussels

Prince Edward Island mussels
First, rinse the mussels. Then, steam them in a pot, lid on, with a small amount of water until the steam comes out of the lid. Discard any mussel that did not open.
Preparation of the paella:
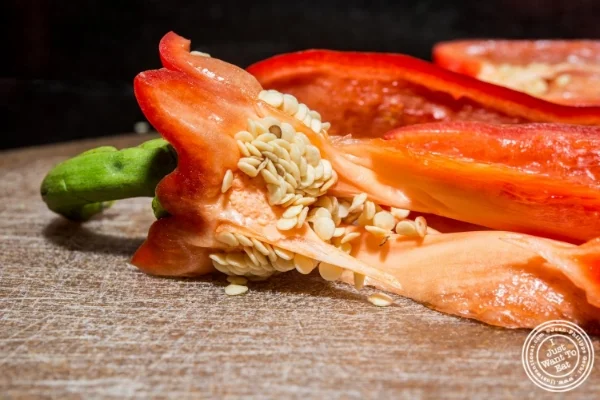
Red pepper

Red pepper

Red pepper and chicken for paella

Jumbo shrimp
Cut the pepper in small pieces, discarding the seeds. Cook the pepper with the chicken in vegetable oil, on medium heat, until the chicken starts being cooked on each side, turning it from time to time. Then, add the shrimp and cook each side for 3 minutes.
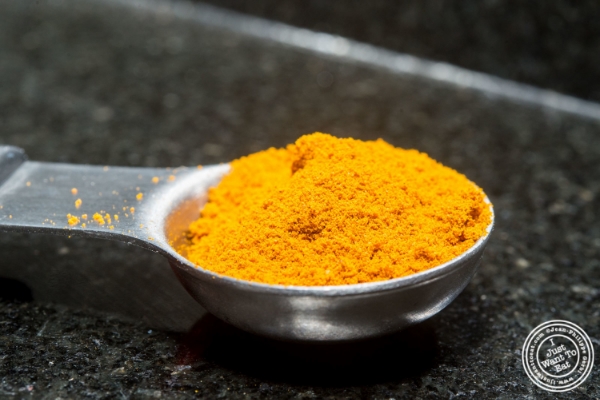
Tumeric

Preparing paella

Preparing paella
Add 3 cups of water, the turmeric, salt and rice. Cook for 45 minutes, stirring regularly and adding water so the rice is submerged.

Chorizo
Preparing paella
Then, add the chorizo slices and the mussels. Cook for another 20 minutes, stirring regularly, so the rice does not attach to the pan.
Et voila!

Recipe: Paella
Bon appétit!
If you like this post, the photos or the blog, please feel free to share it or post a comment. Merci!
Recipe: Butternut Squash Ravioli With Taleggio Cream
Check out this recipe to make some delicious butternut squash ravioli with taleggio cream. In this recipe you will learn how to make homemade pasta! Yum!

Butternut Squash Ravioli With Taleggio Cream
This is a great recipe if you want to make your own ravioli and, of course, love cheese!
Time: 2 hours (preparation and cooking)
Ingredients for the pasta (15 ravioli approx.):
- 1 cup of all purpose white flour
- 1/2 cup of semolina flour
- A pinch of salt
- 4 large eggs
Ingredients for the filling:
- 18 oz Butternut Squash (cubed)
- 1 Tablespoon of mascarpone
- Black pepper
Ingredients for the cream:
- 0.25 lb Taleggio
- 4 oz Mascarpone
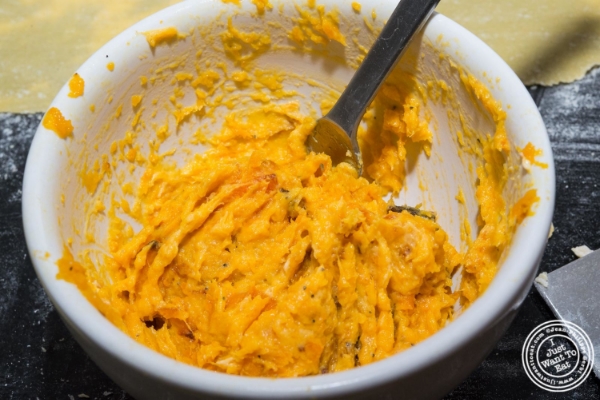
Preparation of the filling:

Butternut squash
Butternut squash and Mascarpone

Butternut squash and Mascarpone
Cook the butternut squash in boiling water until soft. Then put them on a tray with olive oil and roast them for 40 minutes in the oven at 375 degrees Fahrenheit.
Put the roasted butternut squash in a bowl and puree it with a fork. Then add a tablespoon of mascarpone, some black pepper and mix until the cheese is fully integrated with the squash.
Preparation of the ravioli:

Eggs

Making pasta dough

Pasta dough
First and foremost, you need to make a pasta dough.
Put the flour, semolina and salt on a countertop. Create a well in the center and put 2 eggs. Incorporate the flower into the eggs, making a slow movement clockwise. Once the two eggs are fully incorporated, add a third one and mix. The dough has to be soft and light. If sticky, add more flour.
Note: do not knead too much as you do not want the pasta dough to be too compact.

Homemade pasta dough

Using a pasta roller
Cut the dough into a few sizable pieces. To flatten it, I use a Kitchen Aid pasta roller extension that is great, because, with a manual machine, it is easier if you are with somebody else. With the Kitchen Aid, no need. I usually flatten the dough thin, to level 6. Do not forget to put flour on your countertop before laying down the pasta strips, otherwise they will stick to it.

Butternut Squash Ravioli

Butternut Squash Ravioli

Butternut Squash Ravioli

Butternut Squash Ravioli
Once I have long stripes of dough, I prepare my ravioli: I cut each strip in the middle, keeping the wider piece in the bottom. I then put a bit of filling in the center, keeping a distance of 1 to 1.5 inches in between. Then, I will put some egg wash all around the filling so the top layer of pasta will stick to the bottom. When covering the ravioli, do not forget to push the air pockets to the side (otherwise, the ravioli may burst during cooking) and to make sure each side is well closed. Then, cut the ravioli with a wheel to obtain a nice shape.
Cook the ravioli in boiling water for about 7 minutes.
Preparation for the cream:

Taleggio cheese

Taleggio and Mascarpone cream
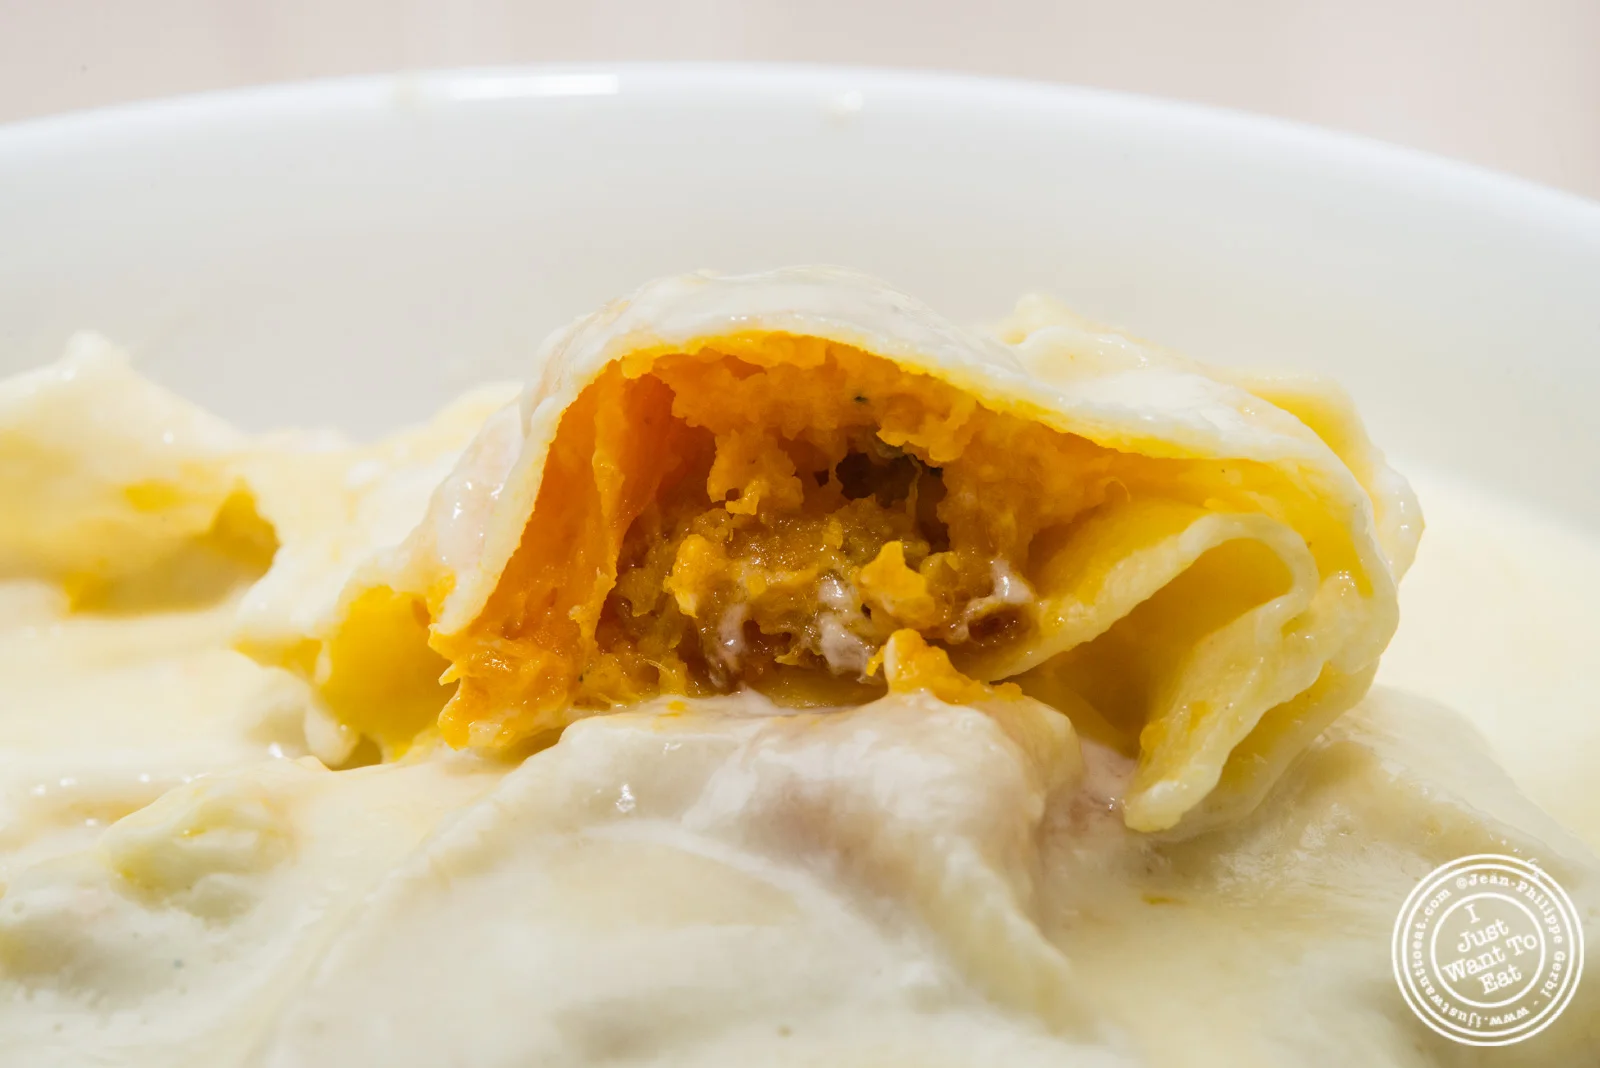
Cut the taleggio in few pieces and put it in a pan with the mascarpone. Cook at medium heat until the cheese is melted and then serve a generous amount onto the ravioli. Et Voilà!

Butternut Squash Ravioli With Taleggio Cream

Butternut Squash Ravioli With Taleggio Cream
Bon appétit!